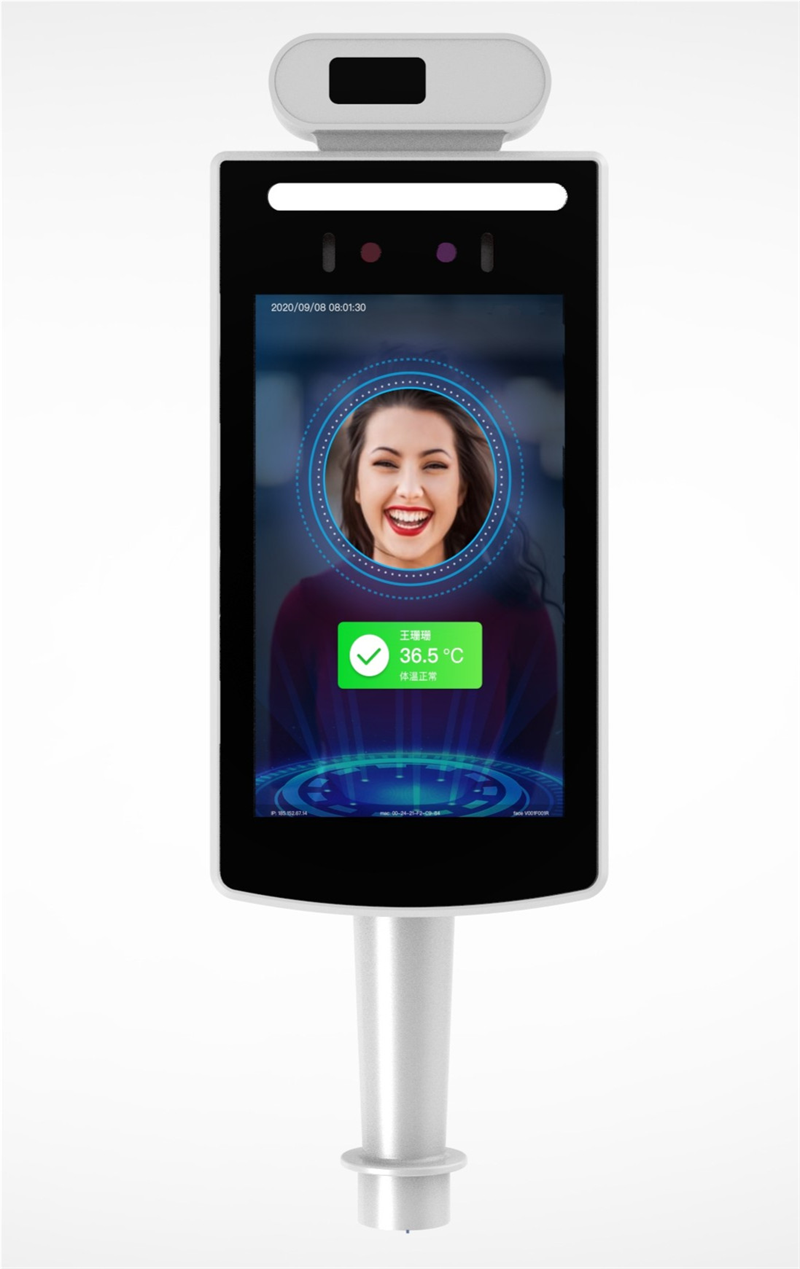
| Product model | Category | Performance |
| Camera | Resolution | 200W |
| Types | RGB+ RGB + IR | |
| Aperture | 4.0mm | |
| Focus | 0 to 2 meters | |
| White balance | Auto | |
| Screen | size | 8-inch, full-view IPS LCD screen |
| Resolution | 1280 * 800, brightness 400cd | |
| Processor | CPU | 4 cores,RK3288 |
| RAM | DDR3 | 2GB |
| ISP | Image Processing | ISP Built-in dual-channel ISP |
| Local storage | 8GB | |
| Accessories | Fill light | Infrared, LED lights |
| Card reader module (Reserved) | IC / ID card reader, ID card reader and thermal imaging temperature detection module | |
| Network module | Support wired, 2.4Gwifi, 4G network card | |
| Port | Audio | line out 1 Audio line out |
| USB port | USB2.0 and 2micros | |
| Serial port 232 | 2 RS232 ports, 1 WG input, and with WG output | |
| Wiegand port | 2.5mmX2PIN | |
| Reset port | Lateral pore position, external buttons | |
| OTG port | In Channel 1 | |
| Functions | Offline locally use | 20 thousand local face database |
| Face Detection | 20 thousand local face database | |
| 1: N face recognition | Support one in 10,000 error recognition with 99% pass rate | |
| 1:1 | Support optional card swiping module, ID card module which can realize 1: 1 face identification | |
| Stranger detection | Support | |
| Distance recognition adjustment | Support | |
| Remote upgrade | Support | |
| Device port | Including equipment management, access control, personnel or photo management, record query, etc. | |
| General parameters | Protection level | For semi-outdoor or pure outdoor use |
| Power | DC12V | |
| Operating temperature | -10℃-60℃ | |
| Working humidity | 10%-90% | |
| Static electricity | 4K/8K | |
| Battery radiation | Not exceeded | |
| Power consumption | 5W MAX | |
| Equipment weight | About3.5 lbs | |
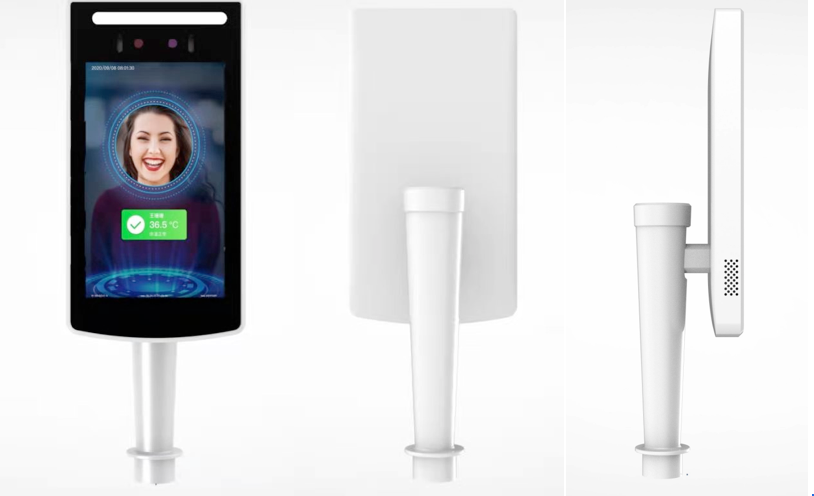
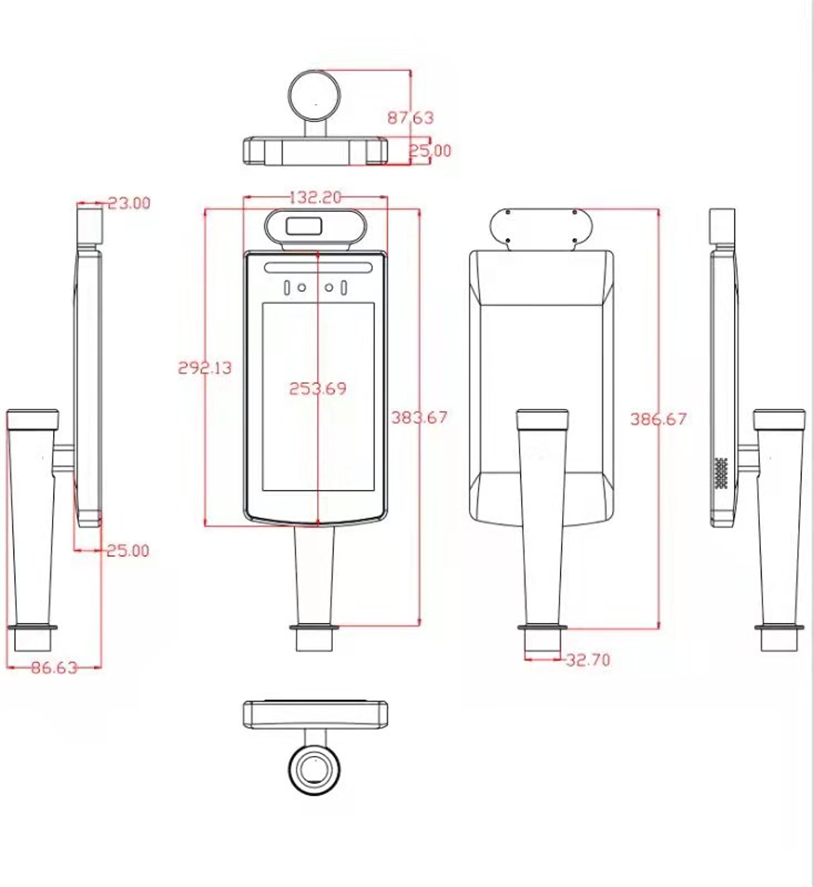
| Equipment size | 373.7*135*85mm |

| Modules | Functions | Introductions |
| Display interface | Boot interface | Neutral (customizable) |
| Verification interface | 1. Including display of prompt ‘Please punch in’ , network signal (whether it is bound / connected), time, date, weekday; 2. Pop-up prompts for abnormal network connection, notification display, ID card information, and prompts for successful or failed verification , which can be customized 3. Including the version number, the number of people, and the number of pictures in database. | |
| Menu interface | Menu style and human-computer interaction, how to enter other modules, management, etc. | |
| User Management | User added | Add people to local apps |
| User delete | Delete people on local apps | |
| Equipment management | Unlocking rules | Door opening time after verification |
| Wiegand / RS23 | Wiegand format 26/34, RS232 | |
| language settings | Simplified Chinese | |
| Network settings | Wired, Wifi, 4G module | |
| Time settings | Time, date, time zone, setting (manual setting or server synchronization) | |
| Voice settings | 0-10 (0 is silent, the default is 5) | |
| Brightness settings | 1-10 (default is 5) | |
| About this machine | Date of manufacture | The equipment time |
| Serial number | Devise serial number | |
| Manufacturer | Manufacturer name | |
| Machine type | Device model | |
| Others | Other functions | Customizable |
Standard body temperature
Body temperature of scanning face
A Instructions for appearance The schematic diagram of the gate is shown in the figure below. Note: If the cable interface is different from the illustration, see the cable supplement on the next page (subject to the actual product and wiring diagram) B Instructions for appearance ①According to the requirements of the installation site, a space of 35mm in diameter is generally opened in the middle or front of the gate, as shown in the figure, ⊕ is the recommended opening position.Single channel gate
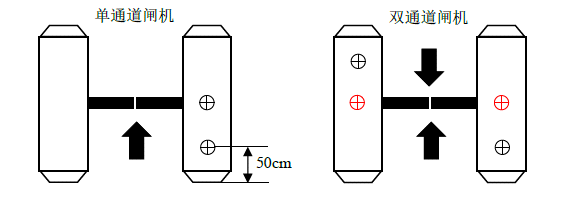
Double channel gate
Note: The position of the opening should be based on the actual application and the type of gate, 35mm is only a reference . ②Unscrew the nut at the bottom of the gate, pass the cable through the nut, and remove the nut, as shown in the figure. Note: Do not connect the network cable, power cable, etc. At this time to avoid installation trouble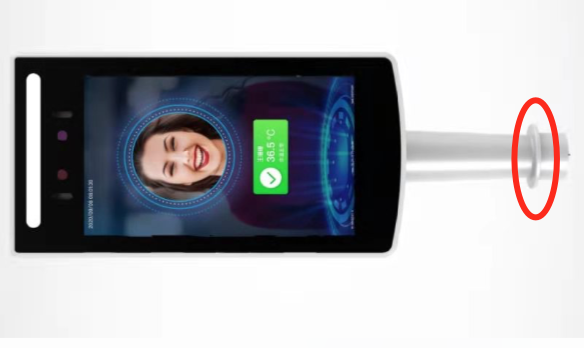 ③Under the gate, pass the cable and cable interface through the washer and nut in sequence, and tighten the nut to the thread , as shown in the figure.
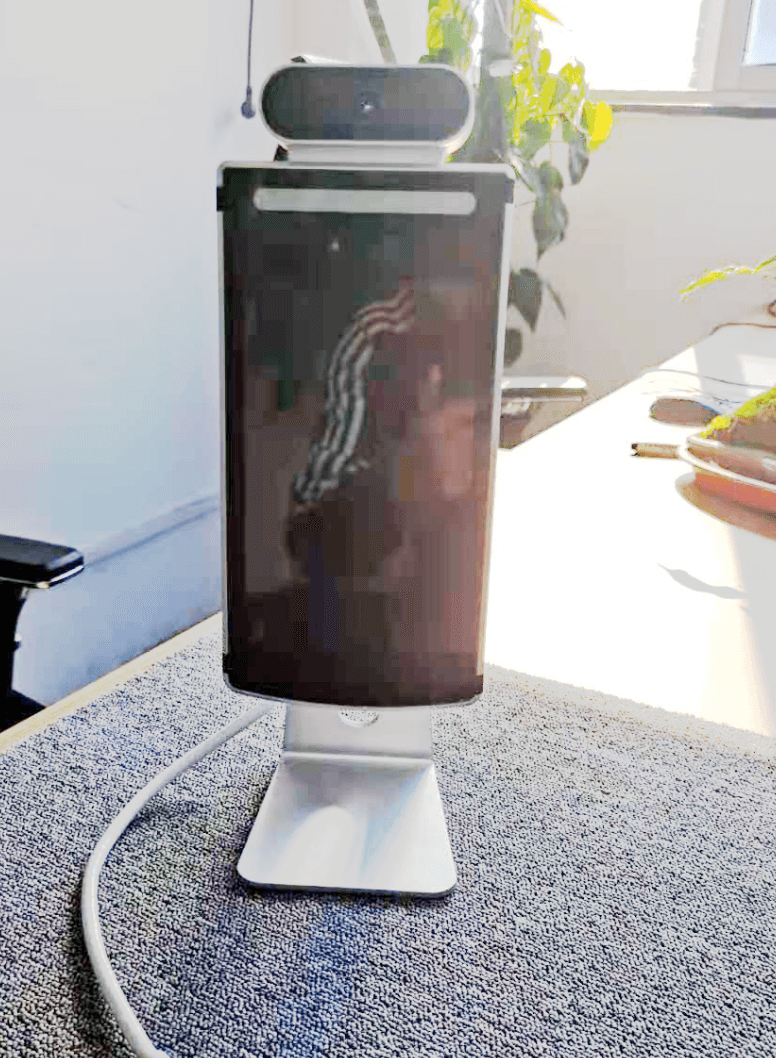
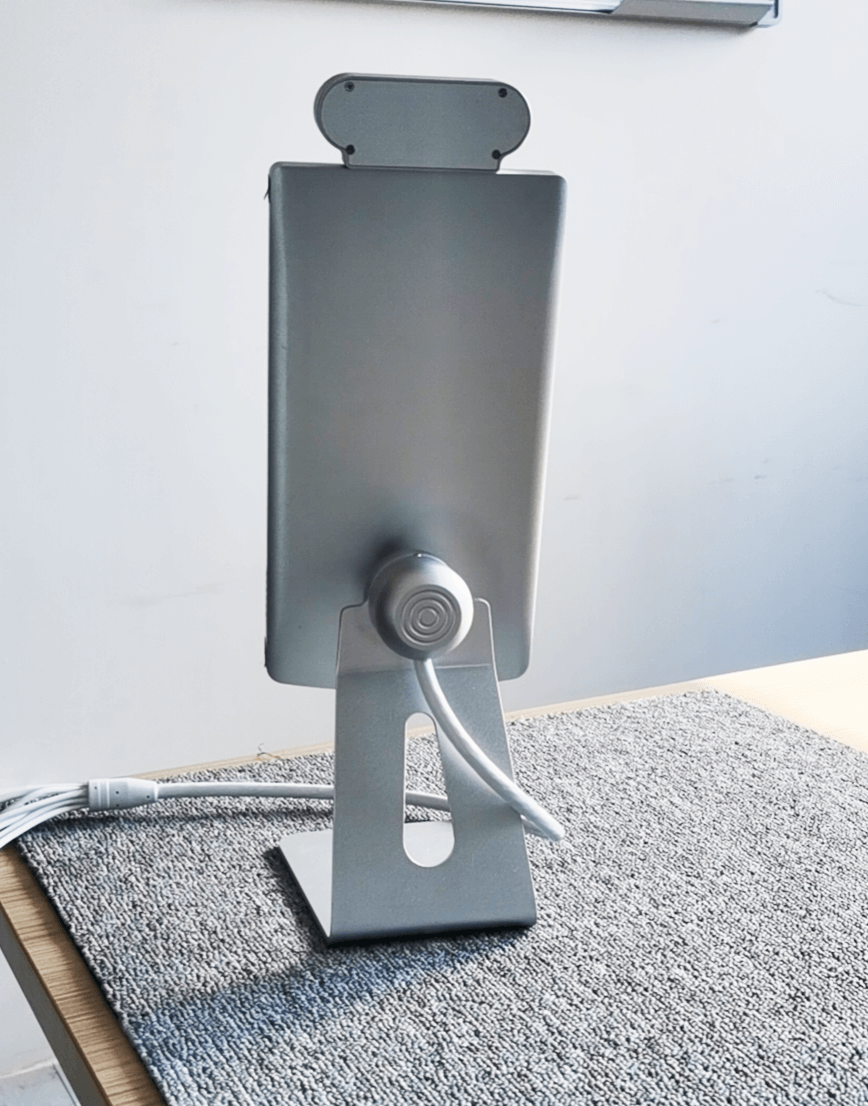
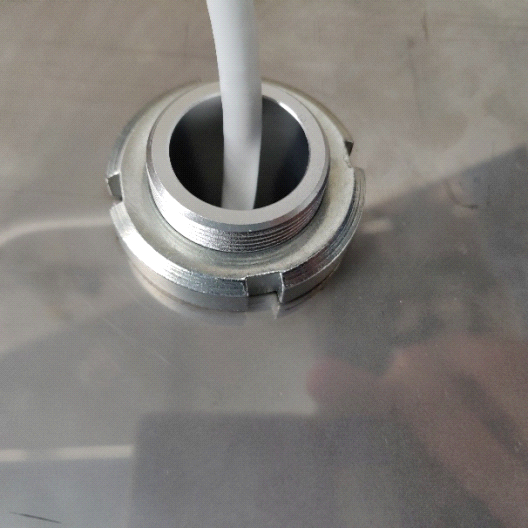 ④Connect the power and network cable, and the screen will start ⑤Hold the post with both hands and turn it gently to adjust the angle of the gate, as shown in the figure. According to the recognition interface, adjust the gate to the proper recognition angle①Place the desktop on the desktop, and place the device on the two "L" card positions above the bracket and adjust the angle; It is suitable for the front desk visitors.
 Switch signal Wiegand inputWiegand output signal 2328-inch face recognition tail wire description
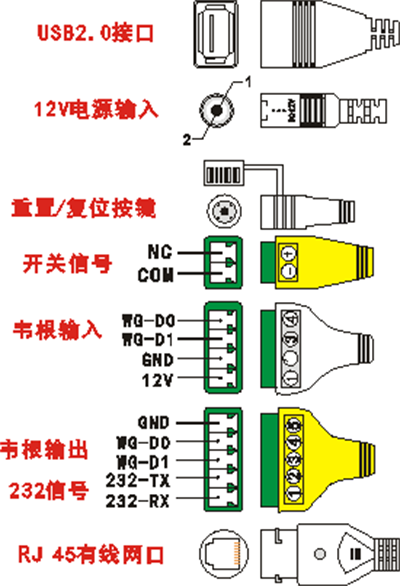 seven gate tail wires USB2.0 interface 12V power input Reset / Reset button Switch signal Wiegand input Wiegand output signal 232 RJ45 wired network port
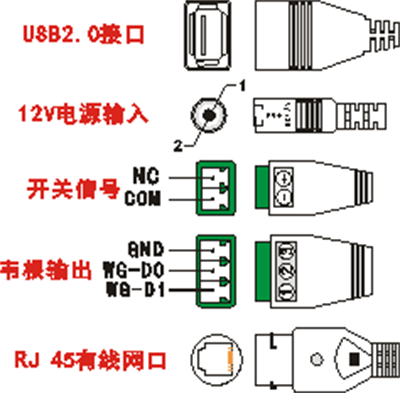 5Wall-mounted tail wires USB2.0 interface 12V power input Switch signal Wiegand output RJ45 wired network port